Washing your motorcycle at home is an important part of maintenance, but it must be done carefully to avoid scratches or damage. With the right approach, you can get your bike gleaming without harming its paint, chrome, or electrical components. Follow this step-by-step guide for a safe, effective at-home motorcycle wash.
The DOs and DON’Ts of Cleaning a Motorcycle
| ✅ DOs | ❌ DON’Ts |
|---|---|
| 🪣 Use Two Buckets of Water • One with water + motorcycle shampoo • One with clean rinse water |
🧴 Don’t Use Car Shampoos or Detergent They can strip wax or damage finishes. |
| 🌤️ Wash Your Bike in the Shade Prevents water spots and soap streaks. |
🔥 Don’t Wash Right After a Ride Hot parts + cold water = trouble. |
| 🕰️ Take Your Time Be thorough; washing is also part of the inspection. |
🐝 Don’t Get Mad Scrubbing Bugs Soften them first with bug remover. |
| ⛓️ Lube the Chain After washing and drying, always re-lubricate it. |
💦 Don’t Use a Pressure Washer It can damage seals and electronics. |
| ✨ Apply Wax to Your Motorcycle Protect the paint and keep it shining. |
🧽 Don’t Take It to a Car Wash Automated systems aren’t bike-friendly. |
Prepare in Advance and Choose the Right Spot

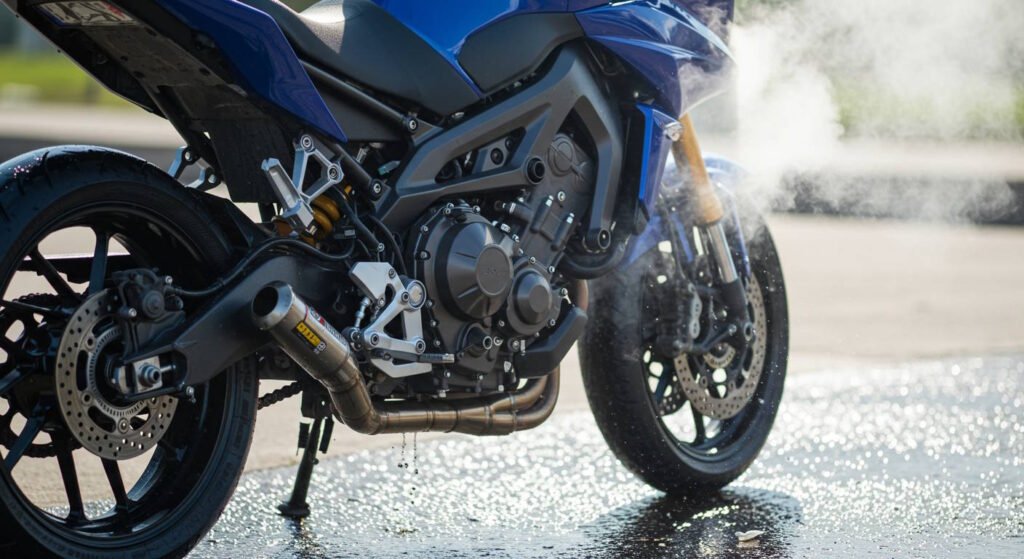
Before you start, gather all necessary supplies and pick an appropriate location. Ideally, work in the shade on a cool bike, never wash a motorcycle right after a ride when the engine is hot, as cold water can cause thermal shock to hot metal and potentially crack engine components. Park the bike on a flat surface (concrete or asphalt is best for drainage) and out of direct sunlight. The sun can dry soap too quickly and lead to water spots or streaks.
What You’ll Need
- Prepare two buckets (one for soapy water, one for rinsing)
- Specific motorcycle cleaner or gentle car wash soap
- Soft sponge or wash mitt,
- A few microfiber cloths
- Various soft brushes for crevices and wheels
Using a cleaner designed for motorcycles ensures it’s gentle on delicate finishes. The owner’s manual may recommend certain cleaners, so check that if unsure. Microfiber cloths and mitts are preferred because they are soft and non-abrasive, reducing the chance of scratches while washing and drying. Also, have a low-pressure hose or a watering can for rinsing; avoid pressure washers, which can force water into seals or electrical parts.
Pre-Rinse to Remove Loose Dirt

Start with a thorough pre-rinse using a gentle stream of water. Rinsing the bike from top to bottom will knock off loose dirt, mud, and road salt before you ever touch the paint. This step is crucial because scrubbing a dry, dirty surface can grind grit into the finish. Don’t skip the pre-rinse: spraying off loose debris first helps prevent scratching when you later wipe with a sponge. Use a garden hose with a normal or mist setting (no high-pressure nozzle) to wet all surfaces. Take care around the instrument panel, ignition, and other sensitive areas; a light spray is enough.

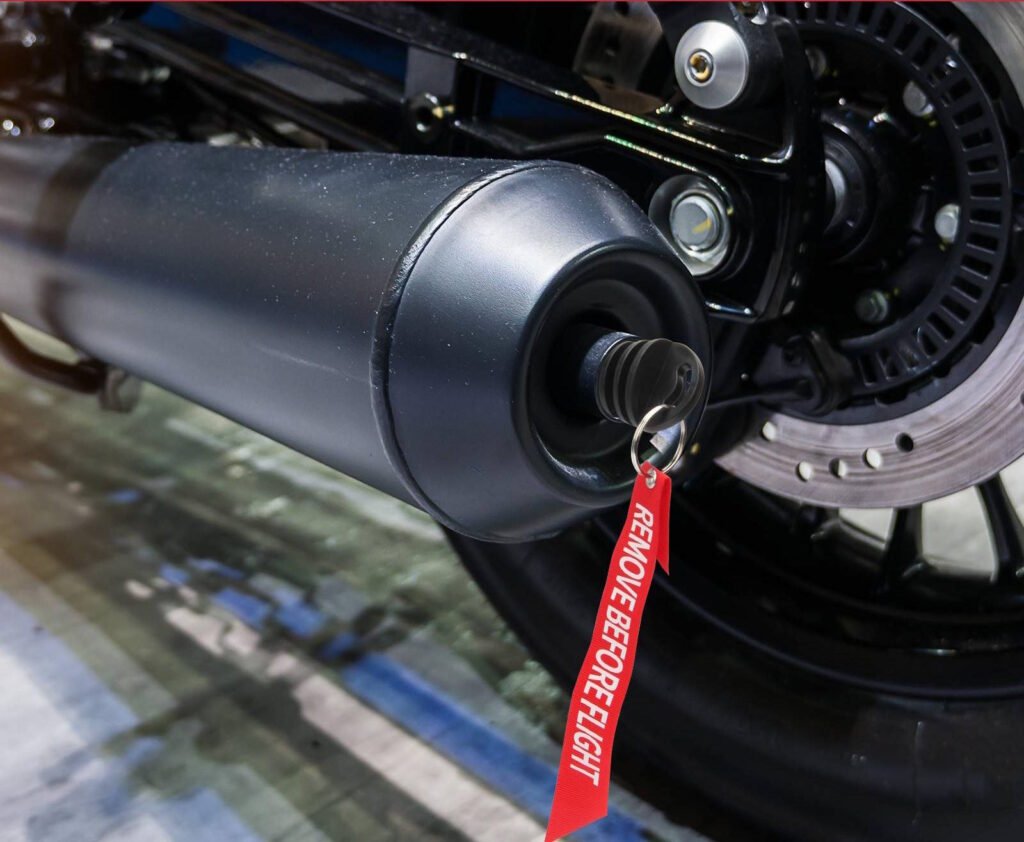
After the rinse, plug up the exhaust outlets with rubber caps or even a clean rag to prevent water intrusion. Also, ensure the keyhole and any open breathers or intakes are covered temporarily. This prep will save headaches later by keeping water out of places it shouldn’t be.
Use the Two-Bucket Method for Washing
When it comes to scrubbing the bike, the two-bucket wash method is highly recommended. Fill one bucket with warm water and the recommended amount of motorcycle shampoo (or a mild car wash soap), and fill the second bucket with clean water for rinsing your sponge or mitt. Every time you need to reload your sponge with suds, first rinse it in the plain water bucket. This way, you deposit the dirt in the rinse bucket instead of contaminating your soapy water. The two-bucket system helps avoid grinding dirt back into the paint, greatly reducing swirl marks.

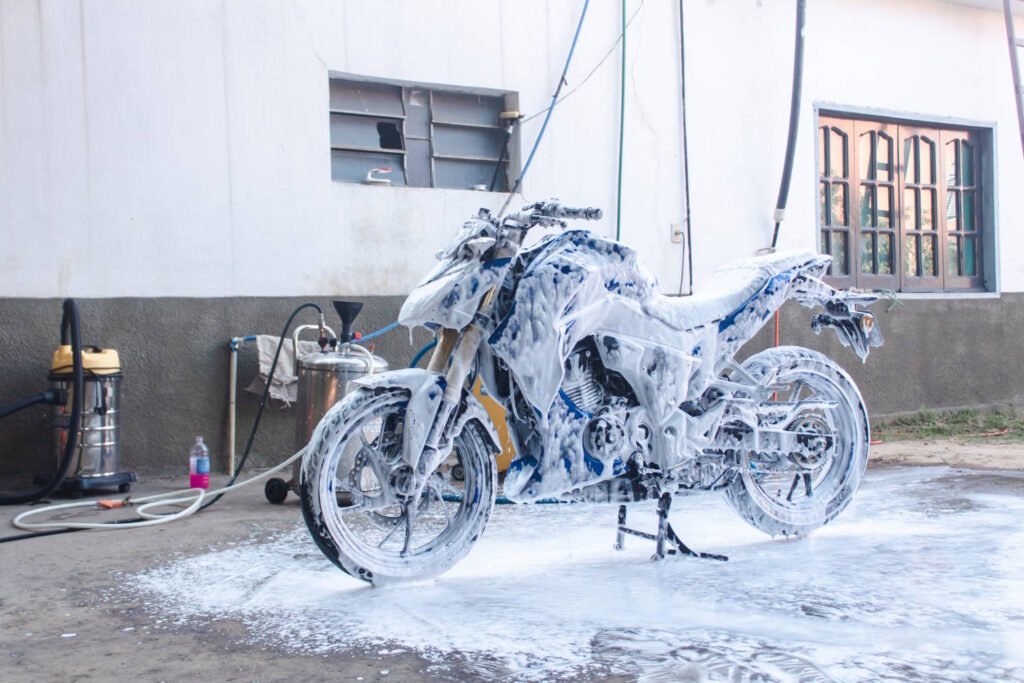
Now, gently wash the bike in sections, from top to bottom. Start with the upper parts like the tank, seat cowl, and front fender. Use a soft microfiber wash mitt or sponge soaked in the soapy water. Do not use abrasive brushes or kitchen scrubbers on painted or chrome surfaces. Apply minimal pressure and let the cleaner do the work. Frequently rinse the mitt in the plain water bucket to release dirt before re-soaping it. This prevents dragging grit across the paint.
Wash one section at a time. For example, cleaning the motorcycle tank and windshield area, then rinse that section with the hose before moving to the mid-section or engine area. Working section by section and rinsing often keeps soap from drying on the bike. It also allows you to catch any areas you missed while they’re still wet.
Use dedicated brushes for tough spots

For intricate areas like around engine fins, behind the forks, or spokes on laced wheels, use a soft detailing brush. Soft bristle brushes help reach tight spots without scratching. Use a separate wheel cleaning brush for the wheels and rims. these often have brake dust and chain fling that you don’t want on your paint. A long, flexible wheel brush can get between spokes or into wheel rims easily.
Similarly, have a small brush (like a toothbrush or specialty detailing brush) for controls, foot pegs, and engine crevices. Always dip brushes in the soapy water and gently agitate grime; avoid using excessive force.
If you encounter bug splatters or other stuck-on gunk, resist the urge to scrub aggressively. Instead, soak tough grime with soapy water or a bug remover spray and let it soften for a few minutes. Stubborn bug residues can be loosened by laying a wet microfiber on them for a short time. Patience is key – scrubbing hard can scratch the clear coat. Reapply soapy water and gently wipe until the bugs come off.
Don’ts: Avoid Common Washing Mistakes

As you wash, keep in mind a few things to avoid for your bike’s safety:
- Don’t use household detergents or dish soap: These are too harsh and can strip wax and dull finishes. Stick to soaps formulated for vehicles. In fact, it’s advised not to use generic car shampoos or detergents on motorcycles, because they may contain chemicals that harm the bike’s paint and components. Mild automotive soap is acceptable, but never use something like dish soap.
- Don’t use a pressure washer: It might be tempting to blast off grime, but high-pressure water can force its way into wheel bearings, electrical connectors, fork seals, and other vulnerable areas. This can cause corrosion or damage over time. A standard hose provides plenty of cleaning power without that risk.
- Don’t wash in direct sun or let soap dry on the bike: Sunlight can dry out the soap and water quickly, causing spots or a filmy residue that’s hard to remove. Always wash in shade or on a cloudy day. If you notice soap starting to dry, rinse it off immediately.
- Don’t use one sponge for everything: The grime on your wheels and lower parts is much heavier. Use separate rags or brushes for the dirty underside, and keep your primary wash mitt for paintwork only. This prevents transferring coarse dirt to sensitive areas (for example, don’t rub the gritty residue from wheels onto your gas tank).
- Don’t rush: Take your time to do it right. Rushing increases the chance of missing spots or making a misstep that could scratch the bike. Washing your motorcycle is as much about maintenance as aesthetics – you’re also inspecting the bike as you go. Enjoy the process and use it to spot any loose bolts, leaks, or issues hidden by dirt.
Rinse Thoroughly and Dry As You Go
After washing each section, rinse it thoroughly with clean water. It’s best to use a gentle stream rather than a strong jet. Ensure all soap is washed off, as residue can cause streaking. Take care to rinse under panels, the underside of the engine, and around the chain and brake calipers where soap and dirt may collect. If your hose has an adjustable nozzle, set it to a shower or wide spray setting to lightly flush the bike.
As the bike is now clean, you want to minimize touching it to avoid new scratches. Drying properly is crucial – see the detailed drying guide below for step-by-step tips on drying without scratching. In brief, use soft microfiber towels to blot water off the surfaces. Microfiber is extremely absorbent and will safely lift water without marring the finish. Do not use old t-shirts or paper towels for drying; they can create fine scratches. If available, a leaf blower or dedicated motorcycle dryer is a great touchless way to get water out of crevices and off the bike.
Finishing Touches: Lube the Chain and Protect
After using a motorcycle chain cleaner or a cleaning brush, it will be clean and dry. There are a couple of final steps to both reward your hard work and protect your bike:
- Lube the chain: Washing the bike chain can remove lubricant from it, so it’s important to re-lubricate it after the bike is dry. Use a motorcycle chain lube and apply it to the chain’s inner run (the part that contacts the sprockets) while slowly turning the rear wheel. Wipe off excess to avoid fling.
- Apply wax or polish: For a truly shiny finish and paint protection, apply a coat of quality motorcycle wax or polish to painted and chrome surfaces. This adds a thin protective layer that guards against UV rays, moisture, and dirt, and makes the next wash easier. Use a microfiber applicator or cloth to apply the wax, let it haze, then buff it off with a clean microfiber towel. The result will be a glossy shine and a protective coating that can last for weeks.
- Protect metal and plastic: You can use a spray detailer or silicone protectant on plastic trim, engine cases, and other metal parts to give them a like-new sheen. Be cautious not to get any on the tire treads or brake rotors. Products like spray wax or protectant should be applied to a cloth first, then wiped on, to avoid overspray.
With everything washed, dried, and protected, do a quick walk-around inspection. Make sure you didn’t leave any clothes in the exhaust or tape on any intakes. If all looks good, treat yourself and the bike to a short ride. But if you are planning for a long route, you’ll need these 12 tools before going to ride.
Not only is it fun to show off your now-spotless motorcycle, but a ride will also help blow out any trapped water from crevices and warm up components to evaporate residual moisture. Enjoy the gleaming finish you achieved at home, and remember that regular, gentle washing will keep your motorcycle looking like new and help spot maintenance issues early. Check each and everything about Kawasaki Ninja 400 Pricing here.


