A dripping tap is one of the most common household plumbing problems, and the good news is that you can fix almost any drippy single-lever kitchen faucet in about an hour. Not only is it annoying to listen to, but a leaking tap can waste significant amounts of water and increase your utility bills. This comprehensive guide will walk you through the most effective methods to stop that persistent drip.
Why Do Taps Leak?
Before diving into repairs, it’s important to understand the most common causes of tap leaks:
- Worn O-rings: These rubber seals deteriorate over time and lose their ability to create a watertight seal
- Damaged washers: The rubber washers at the end of the tap stem can become cracked or warped
- Corroded valve seats: The valve seat connects the tap to the spout, and corrosion can prevent it from sealing correctly
- Loose packing nuts: These can come loose over time, allowing water to seep through
- Worn cartridges: In modern taps, the cartridge mechanism may need replacement
Essential Tools and Materials
Before starting your repair, gather these items:
- Adjustable spanner/wrench
- Screwdrivers (flathead and Phillips)
- Needle-nose pliers
- Replacement O-rings (various sizes from 3/8 to 5/8 inch)
- New washers
- Plumber’s grease (non-toxic, heat-proof)
- PTFE tape (plumber’s tape)
- Clean cloth
- Flashlight or headlamp
Step-by-Step Repair Process
Step 1: Turn Off the Water Supply
Always start by shutting off the water supply to prevent flooding. Look for shut-off valves under the sink, or turn off the main water supply if necessary.
Step 2: Identify Your Tap Type
Different tap types require different approaches:
- Single-lever taps: Usually have a cartridge system
- Traditional two-handle taps: Typically use washers and O-rings
- Monobloc taps: Feature ceramic disk cartridges
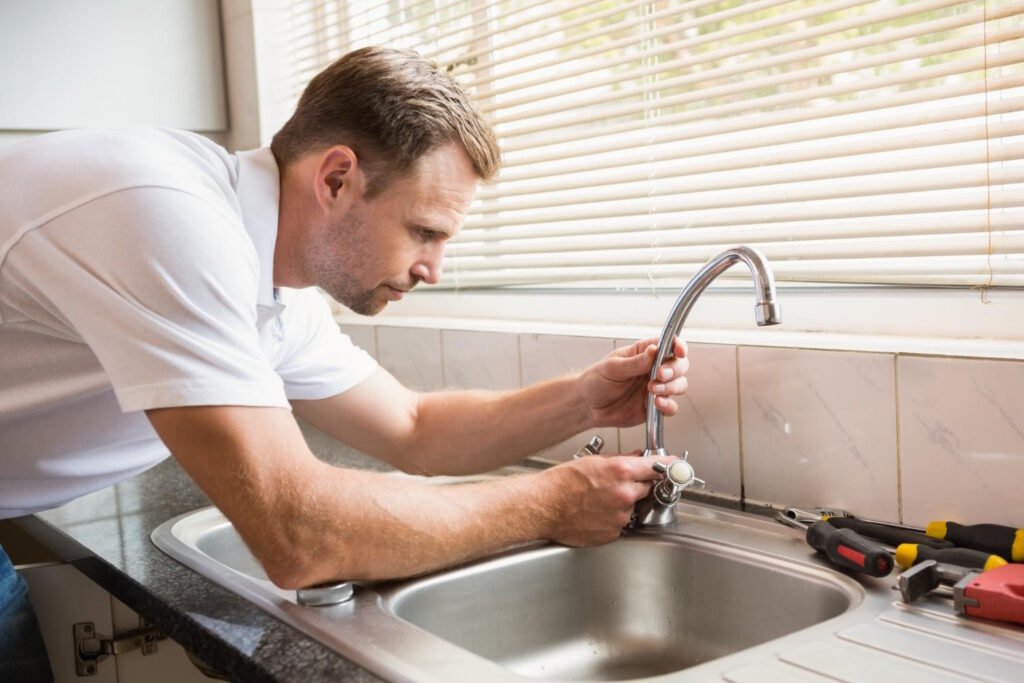
Step 3: Disassemble the Tap
You’ll be able to take the faucet apart, find the problem, and make the repair. Carefully remove the handle, packing nut, and other components, noting their order for reassembly.
Step 4: Inspect and Replace Components
Inspect the O-rings around the housing. Replace any that look damaged or worn. Check washers, seals, and cartridges for signs of wear, cracks, or mineral buildup.
Step 5: Clean and Reassemble
Clean and dry the area around the handle and all the parts with a cleaning solution and cloth. Apply plumber’s grease to new components before reassembly.
People Also Ask: Quick Solutions
How Do I Stop My Tap from Dripping?
The most effective way to stop a tap from dripping is to identify and replace the worn component causing the leak. In most cases, this involves replacing O-rings, washers, or the entire cartridge. The hardest step to fix a leaky faucet or a leaking sink sprayer is usually finding the right replacement parts.
Can a Leaking Tap Be Repaired?
Yes, absolutely! Modern faucets are fairly easy to repair, and most homeowners can successfully fix a leaking tap themselves. The repair process typically takes about an hour and costs significantly less than calling a professional plumber.
How to Replace an O-ring on a Tap?
To replace an O-ring:
- With the coupling nut removed, work the spout up and out of its socket, where you will find the ring(s)
- Replace any defective rings with new rings of the exact same size
- O-rings range in size from 3/8 to 5/8 inch, so it’s crucial to match the exact size of your faucet
- Coat the new O-ring with plumber’s grease
- Reassemble the tap in reverse order
What to Use for a Leaking Tap?
The specific materials needed depend on your tap type and the cause of the leak:
- O-rings: For sealing around moving parts
- Washers: For traditional tap mechanisms
- Cartridges: For modern single-lever taps
- Plumber’s grease: To lubricate and protect seals
- PTFE tape: For threaded connections
Can You Tape a Leaking Tap?
While not a permanent solution, you can use PTFE tape (also known as plumber’s tape) as a temporary fix for minor leaks around threaded connections. Use the PTFE tape to wrap around the threaded area in the same direction. However, this is only a temporary measure. Proper repair with replacement parts is always recommended for a long-lasting fix.
When to Call a Professional
While most tap repairs are straightforward DIY projects, consider calling a professional plumber if:
- You’re uncomfortable working with plumbing
- The tap continues leaking after your repair attempts
- You discover damaged pipes or fixtures
- Plumbers generally charge $50 to $200 hourly for fixing a leaking faucet, but complex issues may require professional expertise
Prevention Tips
To prevent future leaks:
- Don’t overtighten tap handles
- Replace washers and O-rings annually in high-use taps
- Address small leaks promptly before they worsen
- Use quality replacement parts that match your tap’s specifications
Conclusion
Save the cost of a plumber and fix a leaking tap or faucet yourself. It’s easy, cheap, and a fast DIY job that’ll stop the drips. With the right tools and replacement parts, most homeowners can successfully repair a leaking tap in under an hour. Remember, it’s better to repair faucet leaks sooner rather than later due to the amount of potential water waste.
The key to success is taking your time, documenting the disassembly process, and using quality replacement parts that match your specific tap model. With patience and the right approach, you’ll have your tap working like new and save money on professional repair costs.